Notice: Trying to get property of non-object in /home/mo/prod/old.dpk/tools/smarty/sysplugins/smarty_internal_templatebase.php(157) : eval()'d code on line 72
href="/modules//smartblog/images/288.jpg" data-fancybox-group="other-views" class="fancybox shown" title="
Notice: Undefined index: imageTitle in /home/mo/prod/old.dpk/tools/smarty/sysplugins/smarty_internal_templatebase.php(157) : eval()'d code on line 76
Notice: Trying to get property of non-object in /home/mo/prod/old.dpk/tools/smarty/sysplugins/smarty_internal_templatebase.php(157) : eval()'d code on line 76
">

Add or Remove Desktop Icons - Windows 7
191474 Wednesday, April 28, 2021
Introduction
After a clean installation of Windows 7, we see on the desktop only the icon "trash".
You can easily add other system icons like Computer, Libraries, Word, Excel ... and remove those you do not need.
In this article, we will see how to add or remove an icon from the desktop.
Steps to follow
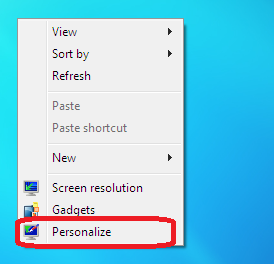
Right-click an empty area of the desktop and choose the Customize command.
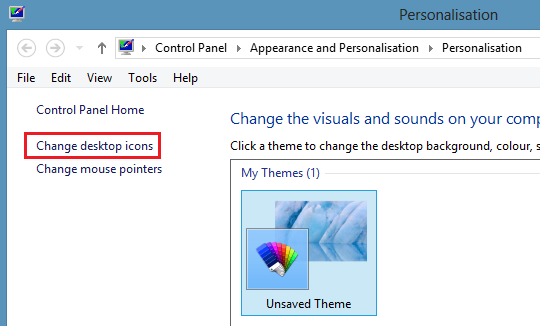
Click on " Change Desktop Icons".
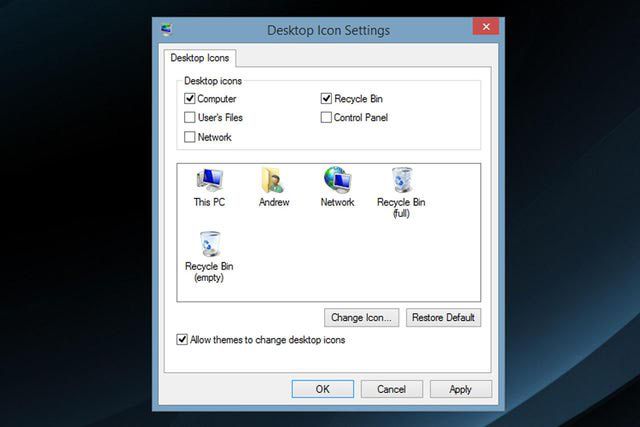
Check the boxes in front of the icons to display on the desktop and uncheck the boxes in front of the icons to be removed.
To read also
Posted in : Windows tips